How to Test an Overload Relay: A Step-by-Step Troubleshooting Guide for Motor Protection
Aug 07,2026 | simplybuy industrial
Overload relays serve as the critical safety barrier for electric motors, shielding windings from overheating, burnout, and costly unplanned downtime triggered by excess current. Routine testing verifies that your relay will trip reliably under fault conditions, ensuring long-term equipment safety and operational continuity. Whether you maintain industrial motor circuits or troubleshoot residential compressor systems, this guide covers safe, standardized testing procedures with clear, actionable steps.
What You’ll Need Before You Start
Gather your tools and personal protective equipment first to ensure efficient, hazard-free testing:
- Digital multimeter (with resistance and continuity modes)
- Dedicated overload relay tester (optional, for precision overload simulation)
- Insulated screwdriver set
- Insulated work gloves and safety goggles
- Manufacturer’s datasheet for your relay model
Step 1: Lock Out Power and Verify Zero Voltage
Safety is non-negotiable for all electrical testing.
- Switch off the main power supply to the motor and relay circuit.
- Follow lockout/tagout (LOTO) protocols to prevent accidental re-energization.
- Use your multimeter in voltage mode to test all input and output terminals, confirming zero live voltage before touching any components.
Step 2: Perform a Visual Inspection
Many relay failures are visible before electrical testing.
Examine the relay body and terminals closely for:
- Burn marks, discoloration, or melted plastic housing
- Corroded, pitted, or loose terminal connections
- Cracked casing or loose, rattling internal components
If you spot obvious physical damage, testing will not resolve the issue. Replace the relay immediately to avoid motor damage or circuit hazards.
Step 3: Run a Continuity & Resistance Test With a Multimeter
This test confirms the relay’s main power poles can conduct current properly in normal operation.
- Set your multimeter to the resistance (Ω) setting.
- Place one probe on the L1 input terminal and the other on the T1 output terminal. Repeat for the L2/T2 and L3/T3 pole pairs.
- A functional, non-tripped relay will show near-zero resistance (full continuity) across each pole.
- If the meter displays “OL” (over limit) or infinite resistance on any pole, the internal contact is broken and the relay is faulty.
Step 4: Simulate an Overload to Test Tripping Action
The core function of an overload relay is to disconnect the circuit under overcurrent conditions.
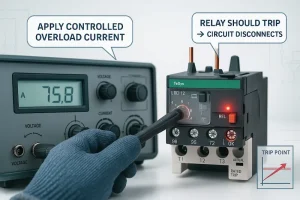
- With a relay tester: Apply a controlled current above the relay’s rated full-load current. Monitor the trip time and trip current, then compare the results to the manufacturer’s published specifications.
- Without a tester (thermal relays): Press the built-in manual test button on the relay body. This mechanically simulates the deflection of the bimetallic strip to trigger a trip.
If the relay fails to trip, trips prematurely, or trips inconsistently, it requires adjustment or full replacement. A relay that does not trip at the correct current level cannot protect your motor.
Step 5: Reset the Relay and Verify Recovery
After testing, confirm the relay can return to normal operating state:
- For manual-reset relays: Press the reset button on the front of the unit.
- For automatic-reset relays: Allow sufficient cool-down time for the internal thermal elements to reset on their own.
Run a second continuity test across the main poles to confirm the relay has fully reset and restored electrical conduction.
When to Replace Your Overload Relay
Even if a relay passes basic checks, replacement is the safest, most cost-effective choice in these scenarios:
- Failed continuity: No conduction across one or more main poles means the relay can no longer carry operating current.
- Incorrect tripping behavior: Tripping too early, too late, or randomly indicates the relay is out of calibration and cannot provide reliable motor protection.
- Visible physical damage: Burns, corrosion, cracked housing, or loose internal parts all signal end-of-life failure.
Low-quality or counterfeit relays lead to inaccurate test results and unexpected system failures. Our store carries 100% genuine overload relays from trusted global manufacturers, built to match original equipment specifications for consistent, dependable protection.![]()
FAQs on Overload Relay Testing
How do you test a thermal overload relay?
Thermal overload relays use a heat-responsive bimetallic strip to trigger tripping. Start with a standard multimeter continuity test across the main terminals. Most units include an integrated test button – press it to mechanically simulate an overload and confirm the normally closed contacts open and the relay trips. After testing, reset the relay and recheck continuity to confirm full functionality.
How do you test a refrigerator overload relay?
Refrigerator overload relays protect the compressor motor from overcurrent damage. Unplug the appliance and disconnect the relay from the compressor and power supply. Set your multimeter to ohms mode and test across the relay’s input and output pins. A working relay will show continuity at room temperature. If you get no reading, or hear rattling parts when shaking the unit, replace the relay immediately.
How do you test a PTC relay and overload protector assembly?
Many refrigerators pair a PTC (positive temperature coefficient) start relay with an overload protector. For the PTC relay: Measure resistance across its terminals – a healthy unit will show moderate, finite resistance (not zero and not infinite). For the overload protector: Run a continuity test at room temperature; it should read closed (full continuity). If it shows an open circuit at room temperature, the protector has failed and requires replacement.
Final Takeaway
Routine overload relay testing is a simple, high-impact maintenance step that extends motor lifespan and prevents expensive downtime. By following these safe, structured steps, you can quickly diagnose faulty components and keep your electrical systems running reliably. Always match replacement relays to your motor’s full-load current rating for optimal protection.
Need help selecting the right overload relay for your application? Browse our full catalog of motor protection components, or reach out to our technical team for expert sizing support.![]()

Comment